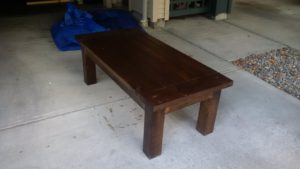
This was my take on the “Tryde” coffee table. Credits for the design go to Ana White (Tryde Coffee Table, <http://www.ana-white.com/content/tryde-coffee-table>, last accessed 2016-08-08). The plans were very straightforward, though one should carefully plan the location of the countersunk pilot holes to join the end runner with the leg posts, and the side aprons to the end runner, so the holes don’t overlap.
A few of the original joints I either replaced or supplemented with pocket holes via a Kreg jig, since I was working with #8 @ 2.5″ wood screws, and even with pilot holes, I could see some test boards splitting open with a screw being drilled in from the end grain. I went down to 2.5″ from the recommended 2.75″ due to how deep the countersink bit goes for my pilot/countersink bit. Finally, I recommend having a pair of large trigger clamps that can convert to spreaders for when you are installing the end aprons. I used a bit of TiteBond III glue plus pilots holes/screws to hold it snugly in place, but needed the spreaders to buy me a mere 0.5mm of extra space without having to hammer in the board and risk shearing some of the board face.
After putting together the table, applying (stain-able) wood filler over the pilot holes, and sanding it down thoroughly with 80 then 120 grit sandpaper, it’s time to start decorating the table. I used a cheap 2HP portable ArmorAll shop vac that I typically attach to my mitre saw as a dust collector, as it can convert to a powerful air blaster with the fine nozzle attachment, to remove all the dust stuck to the table.
From here, I fill a disposable spray bottle with a strong brew of four green tea bags after it has cooled, and spray down the entire table (it doesn’t have to be any special tea, as I just used the Twinings stuff that’s $10.00 for a hundred bags). It gets a slightly darker tinge. Now I prepare a second spray bottle filled with 7.5% pickling vinegar, and a fine mesh non-stainless piece of steel wool. All these items maybe cost me $8.00 at the local grocery store.
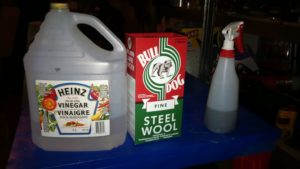
Once the green tea has had at least 5 hours to dry and soak in, I sprayed down the entire table again with the vinegar-mesh solution. Apparently it reacts with the tannins in the tea. Pine doesn’t have many tannins present naturally, so the vinegar solution alone won’t have much effect. The leg posts were made of fir though, and they had a noticeable effect. I also sprayed some on a piece of spare BC red oak, and the effect was immediately noticeable. Anyhow, make sure there’s plenty of ventilation, and a few hours later:
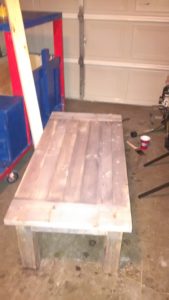
Voila. The flash on my camera offset the color balance, but the table now has a beautiful grayed look, like it’s made out of old reclaimed wood that has suffered the elements and UV damage. Also, the grain texture is more pronounced. Now, time for some walnut stain.
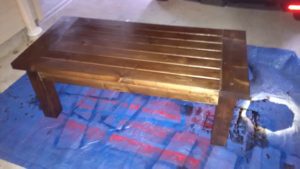
Finally, a coat of satin poly, and we’re set. I tried matte, semi-gloss, and full gloss on a test piece, and the satin finish seemed the most appropriate for a “traditional” design like this. I wouldn’t go with semi- or full gloss unless you plan to individually square and glue the tabletop planks together, run it through a thickness planer for a perfectly flat top, and sand it down to at least 240 git for a much finer look.
All done!